Find out how you can install cable trays faster and easier with our innovative patented product Hermi® Fast Joint. In the video, you will be able to see a comparison between using Fast Joint or bolts and nuts to connect two cable trays. Article Summary: A compliant cable tray installation requires a thorough understanding of NEC Article 392, proper structural support, and precise installation techniques. This guide covers the critical steps, from selecting the right electrical cable tray and performing accurate cable fill. Whether you're building a commercial setup or upgrading an industrial plant, proper cable tray installation ensures neat wiring, safe access, and easy maintenance. But before you lay the first tray or clamp down a single cable, you need a solid plan. This guide breaks down the process step by step. Here is a step-by-step guide on how to install a standard metal cable tray system (e., ladder or perforated type). Before starting, ensure you have. In order to begin the job, trace a straight line where the trays will pass. This is most appropriately done using a laser level. It casts a clear light beam on the ceiling or wall that will enable an individual to determine whether the course is completely straight before any holes are drilled. The key requirements for cable tray installation include: Incorrect installation can lead to overheating, cable damage, or system failure.
[PDF]
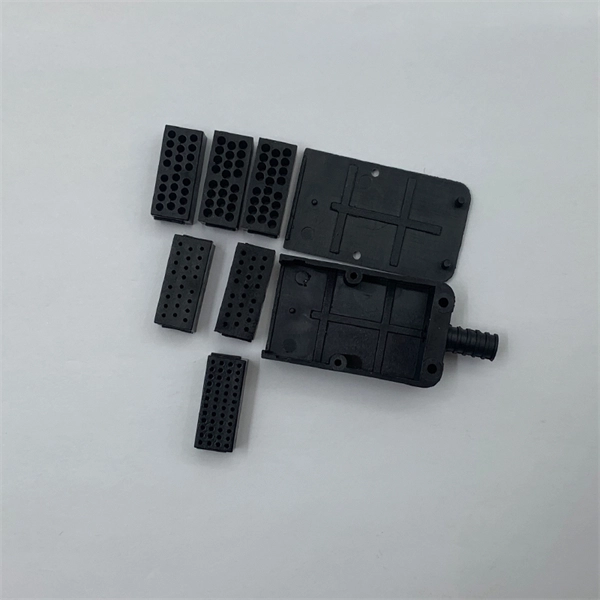
Buyers typically pay a broad range for replacing a distribution box, driven by box size, amperage, wiring runs, and local labor rates. This article outlines the cost factors, price ranges, and practical budgeting advice for a U. In this guide, we'll break down everything you need to know to install a distribution box correctly and confidently. Choose the right box based on environment (indoor/outdoor), load capacity, and durability. Check for proper IP/NEMA ratings and material quality. Ensure safe placement: install in. Whether you are an electrical contractor or a construction brigade, knowing how to properly and safely install distribution boxes is the basis of ensuring the safe operation of the entire system. Whether it is residential buildings, commercial facilities or industrial sites, the. Learn how to wire a distribution box step by step! This video shows real on-site footage of electrical installation, demonstrating safe and standardized wiring methods used by professionals. A well-chosen and properly installed distribution box can prevent electrical hazards, reduce downtime, and ensure your electrical system operates smoothly for years to come. Cost and price details focus on realistic estimates.
[PDF]
HUAWEI WDM replacing the optical module video shows you how to replace an optical module. HUAWEI WDM Documentation:. This section describes how to install an optical module. The method used to install a copper transceiver module is the same, except that the copper transceiver module connects to a network cable instead of optical fibers. Never look directly into an optical module or the ends of optical fibers. Step 2: Take out the optical module, ring and label up, the gold finger is facing down, Note that the right. To avoid component damage caused by improper operation, we should strictly follow the following procedures for installation. 6 Parts Replacement l The BMC serial port, SYS serial port, and GE electrical port are standard RJ-45 ports, and their cables can be installed in the same way.
[PDF]
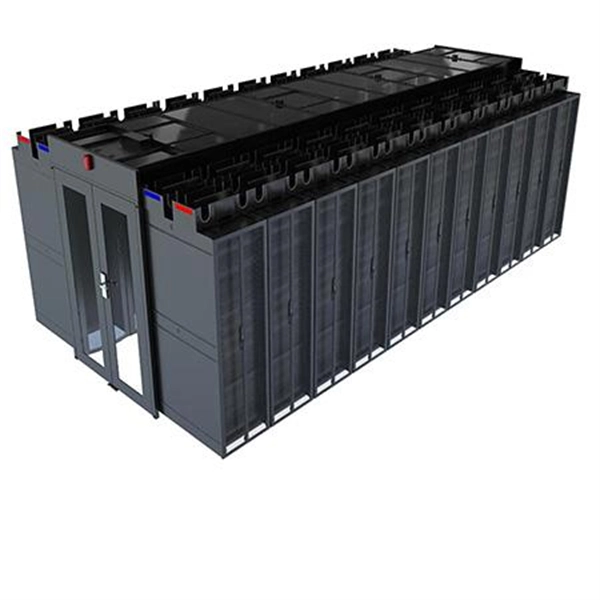
To plan your patch panel port density and rack cable layout, first estimate how many ports you need in your rack. Rack height is measured in rack units (U). 75. This guide explains how system integrators choose the right port density based on rack layout, patch cord volume, and long-term serviceability (not just “it fits in 1U”). If you're comparing options for a build, start with AMPCOM Patch Panels. Choose a 24-port patch panel when you care about clean. Learn Cat6A requirements for Wi-Fi 7, PoE++ thermal management, SFP+ uplinks, and proper installation techniques for 10Gbps infrastructure. Modern network racks face new physical constraints: deeper switches, hotter PoE++ loads, and thicker Cat6A cabling. Follow these nine simple steps and you'll quickly bring order out of chaos. Split the cable bundle before routing it to the rack. Route the cable and connectors that will. Creating a rack diagram is an important step to having sustainable good cable management in the network cabinet. Rack Elevation or Server Rack Layout Software are simple tools to plan and document the cabling of your server cabinet. To make it even easier for you, we launched the free online Rack. How do you figure out the right number of rack units for your network rack? Labeling your server and network racks and why you really need to do it! Check out the video for all of this information! What is a server and/or network rack and how do they compare? Server racks, from a strict technical.
[PDF]
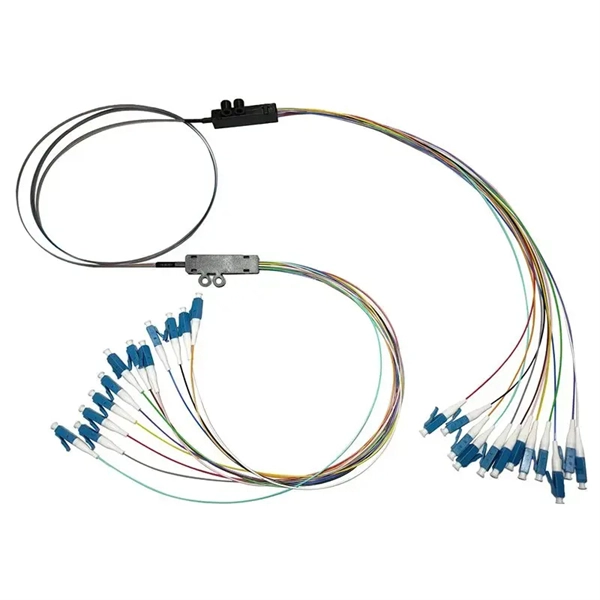
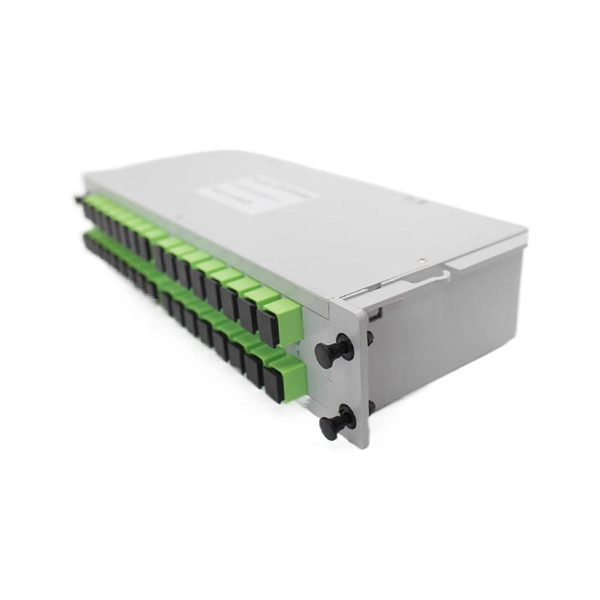
Most modern fiber-enabled network switches require an SFP transceiver module featuring a duplex (two strand) multimode OM3 or duplex single mode OS2 connection with LC connectors. Direct attach cables with pre-terminated SFP connections may also be used. Download the. In this article, we'll explain how to connect multiple Ethernet switches using fiber optic cables and the equipment required for this to work. Network topology refers to the way in which the links and nodes of a network are arranged in relation to each other. Download the Application PDF SFP transceiver. Choose an SFP module based on the fiber optic cabling that will be connected to the network switches. Always integrate duplex (two strand) fiber optic cabling or higher strand counts. So all PCs connected to each switch would reach the LAN/WAN from the other switch. The connection between two or more Ethernet switches in a certain way (Uplink port, etc. ) is called the cascade. Connecting a fiber optic switch involves several steps, ensuring compatibility between the switch's ports and the fiber optic cable. The process requires understanding the type of fiber optic port on your switch and selecting the appropriate transceiver module. Fiber optic switches utilize.
[PDF]

In this step-by-step tutorial, we'll cover: ✅ Tools you need ✅ Safety precautions ✅ Mounting the box ✅ Wiring tips ✅ Final checks Perfect for beginners, DIYers, and electricians who want a clear installation guide. more Learn how to properly install an electrical . Learn how to install a distribution box safely and correctly. Covers wiring, placement, standards, and expert tips for a compliant setup. A distribution box is the heart of any electrical system. It takes the incoming power and safely distributes it to different circuits throughout your building. This article details the process of installing them, which helps you comprehend distribution boxes. Electrical boxes (junction, switch, or receptacle) protect electrical connections from physical damage and accidental contact. Code requires these enclosures to house wire splices and terminations, mitigating the risk of short circuits and electrical fires. Installing and securing the correct box. In modern electrical systems, cable distribution boxes (also known as electrical distribution boxes or distribution boxes) play a crucial role as the key hub for managing, distributing, and protecting circuits. Here's a simple, user-friendly guide to help you through the process. Safety first! Locate the circuit breaker panel in your home and turn off the power to the area.
[PDF]
This guide discusses common cable tray problems, from loosening and corrosion to grounding issues and installation errors, along with strategies for prevention and resolution. Understanding the root causes of cable tray failures is the first step toward ensuring system reliability. How to do the voltage drop calculation of instrument cable? Problem 3. Insufficient Cable Support and Sagging Cable sag results from incorrect spacing of cable tray supports or from employing the incorrect tray type that is, light-duty perforated trays in high-load applications. Complicating the. Cable tray failures can cause operational disruptions, equipment damage, and safety risks. For engineers, contractors and facility managers, understanding common problems in steel cable tray installations – and knowing how to avoid them – is. But when issues like loosened cables, corrosion, cracking of components, or grounding failures pop up, the attention falls on them. Nine times out of ten, the root cause traces back to an installation decision made months or years earlier.
[PDF]

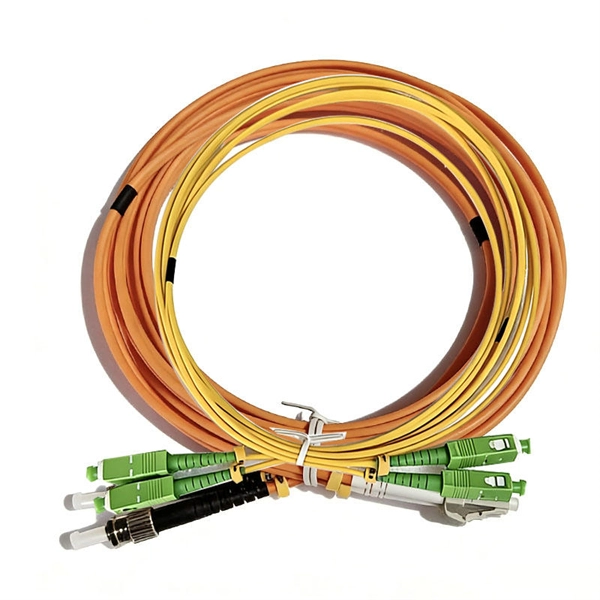
Typical rates range from $0. 00 per ft depending on terrain, access, and required precision for termination. Basic — 1,000 ft single-mode run indoors with minimal termination: Cable $0. 00/ft, Permits $150, Accessories $100. Total ≈ $2,650–$3,100. 🔥Buy Fiber Cables products online from DanounTech the best tech store📱 in Lebanon🇱🇧 | find low prices everyday, and enjoy fast delivery🚚. DanounTech | LEBANON. Fiber optic solutions (drawers, panels, connectors. ) | Fibre optic cables | !. 50-meter, 2-core single-mode fiber optic cable with APC (Angled Physical Contact) connectors, providing low-loss, low-reflection performance for high-speed data transmission. Ideal for FTTH, telecom, and network infrastructure requiring reliable duplex connectivity. Each cable features advanced fiber optic technology to deliver superior performance, low latency, and high bandwidth. Anixter is your source for Indoor/Outdoor Fiber Optic Cable products. olx Lebanon offers online local classified ads for Fiber Optic. Post your classified ad in various categories like mobiles, tablets, cars, bikes, laptops, electronics, birds, houses, furniture, clothes, dresses for sale in Lebanon.
[PDF]
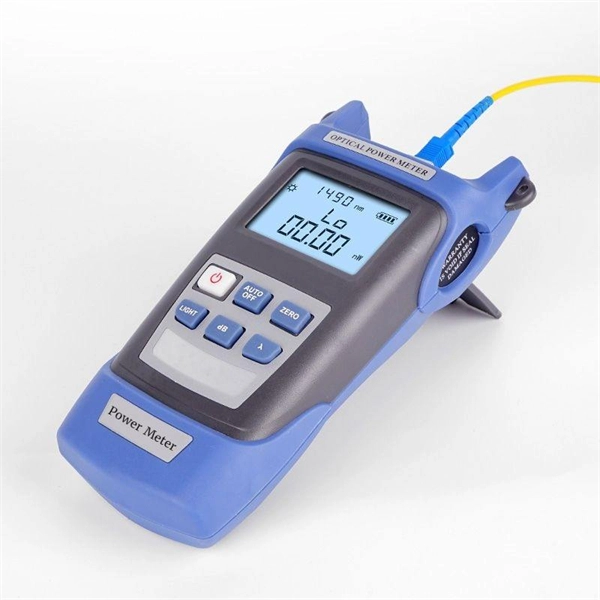
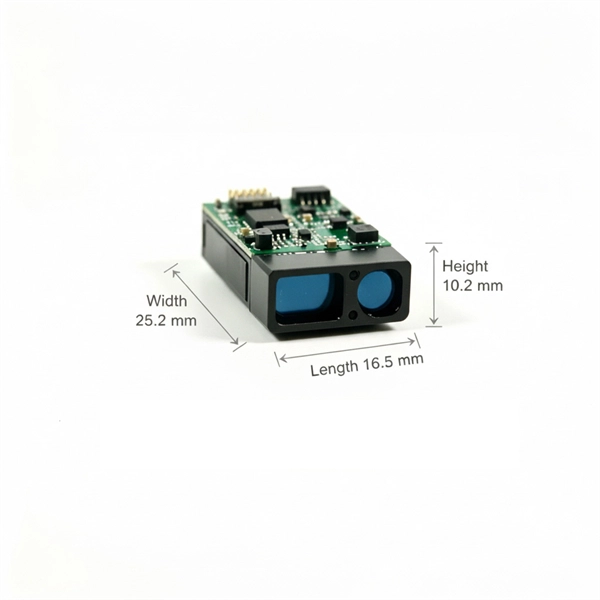
To check a fiber connection, connect a jumper to the optical source port and the other end to an optical meter. Press the “test” or “signal” button to send a signal from the source to the meter. While there are many different fiber optic cable tests, the most common version is an insertion loss test, also known as an attenuation, jumper, or connectivity test. This test requires a special testing kit and protective eyewear, but it will help you diagnose problems with the cable's. We'll explain why it's vital to test fiber optic cables, the three most popular methods, and when you should use them. Related: Fiber Optic Connectors – Identification Guide Regularly testing fiber optic cables helps minimize network downtime, lengthens the network's longevity, reduces maintenance. In this guide, we'll explore effective methods to check your fiber connection, including tools required and common issues to look out for. Below is an in-depth guide on how to assess the health and performance of a fiber optic connection: Before relying on technical tools, start. Whether you're a professional or a DIY enthusiast, knowing how to test fiber optic cables is crucial. In this blog, we'll explore different methods, including using a flashlight, advanced tools like Fluke testers, and more cost-effective options for testing fiber optics. In fiber optic communication, data is transmitted over two strands of fiber: one for.
[PDF]
Make Straight Cable Into Coiled / Pigtail Cable: Here is a super-easy way permanently coil a cable such as a USB, Lightning, or similar data / charging cable. I recently upgraded my iphone and had to upgrade all my cables too. I like the coiled type for. Drunk posting ill conceived instructables since 2009. Prevent kinks and create neat order out of ropes, lines, extension cords, etc. by coiling them after use. Make sure that the medium you are coiling is clean and ready to be put away. Your dominant hand will be the coiling hand, your non-dominant hand will just hold the coil. Take one end of the. How to Make a Custom Coiled Cable, No Soldering, No Extra Tools, Just a Hair Dryer, A Wooden Stick, and a Cable. It can be done in just a few minutes!. more Audio tracks for some languages were automatically generated. Whether you're an audiophile, a musician, a technician, or simply someone who wants to keep their cables tidy. A good rule of thumb is about 7ft of cable per 1ft of coil. You won't be able to sleeve the cable after it is coiled. Once the cable is sleeved, use the electrical tape to attach the cable to the wooden dowel. The cable should be slanting. Here are some tips for maintaining your cables and hose by stowing them carefully: Believe it or not, there is a right and wrong way to coil cables, such as extension cords. In essence, this idea is OK.
[PDF]

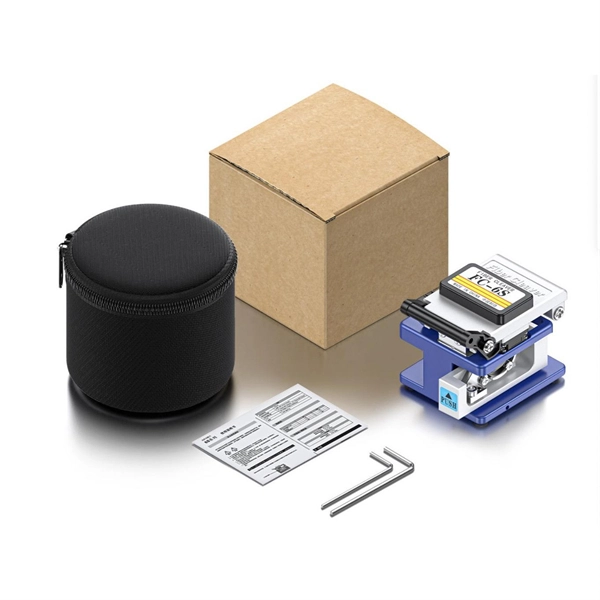
Key price drivers include cable type, fiber count, and installation complexity. data-formula=”cost = (length × cable price) + labor + permits + equipment + contingency”> In fiber projects, two niche-specific factors matter: (1) whether single-mode or multimode fiber is used . Fiber optic splicing costs vary widely depending on project size, location, fiber type, and site conditions. For most commercial projects, expect to pay $50–$150 per fusion splice point - but that number can swing in either direction based on the factors below. The "per splice" rate is the most. The price of fiber optic cabling depends on cable type, length, installation method, and surrounding materials. Typical costs hinge on fiber count, indoor versus outdoor use, and whether trenching, splicing, or termination is required. This guide provides practical ranges in USD and practical price. The cost of fibre splicing is significantly influenced by the equipment and tools needed for the process. High-quality fusion splicers are essential for precision and reliability, but they come with a hefty price tag. a mechanical splice of $5-12. On the surface of it, fusion splicing is less expensive. But when you add in the cost of the setup time for one splice, it more than negates the cost savings of the splice by adding the labor time. This guide lays out cost expectations, with clear low–average–high estimates and regional nuances.
[PDF]
While there are situations when you will have to route cable through structural members such as studs, joists, and rafters, the job is much easier if you can run the cable along the surfaces of these frames. When you have a situation where you need to run cable through. Running new wiring within existing, finished walls of a wood-framed structure is a common necessity for home upgrades, whether for installing low-voltage data and audio cables or for extending line-voltage electrical circuits. Another is to conceal the cords and cables within the walls. This guide will help you learn how to run low voltage cables through the wall using low voltage boxes and face plates. To learn how to add. Many home improvement projects require you to install new electrical cables inside finished walls. The process is often called "snaking" or "fishing," with good reason. Cables often must be bent, slithered and coaxed around stud spaces and through small holes in the framing. Click on any image to see a larger version. When installing an electrical box, drill a hole in the floor between the studs on the same side as the electrical box. Staple down the wire right above the hole and. Method One: In order to cut the panel correctly, you first need to make the right measurements. Mark this distance on the panel you will be using. Make sure to mark this from the top.
[PDF]
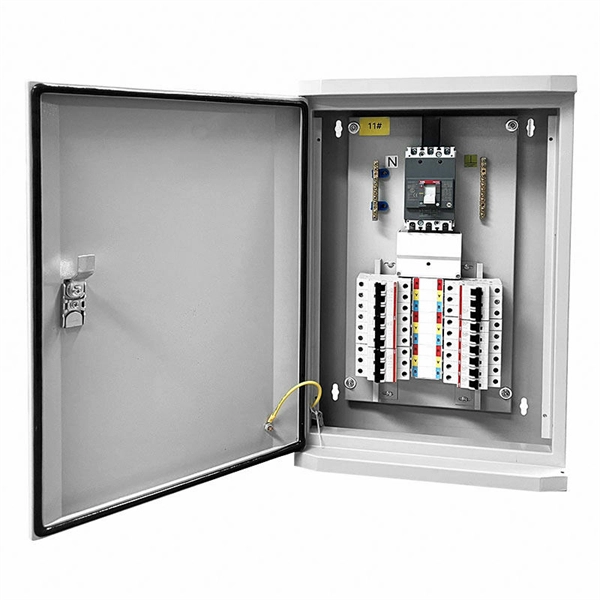
Proper installation and maintenance of distribution cabinets are crucial for ensuring the safety and reliability of the electrical system. Choose the right box based on environment (indoor/outdoor), load capacity, and durability. Check for proper IP/NEMA ratings and material quality. Let's see what factors need to be taken care of when choosing the installation place. Accessibility is one of the most. Hi everyone, in this video, let's connect and install the distribution cabinet for the apartment. #electrical #electrician. more DISTRIBUTION ELECTRICAL CABINET CONNECTION PROJECT. #electrical. A cable distribution box is an electrical device used to collect, distribute, and protect electrical power. It is usually equipped with circuit breakers, fuses, terminal connectors, and other components. It is mainly used to isolate fault circuits, prevent overload, and ensure the safe operation of. duct, please dispose the pro ormal operation due to poor manufacture quality. A paid repair will be provided if the warranty period expires. For single row. - For surface-mounted distribution boxes on the wall, the indoor ceiling, wall, and decoration should be completed before installation; for flush-mounted control (distribution) boxes, the reserved holes, and conduits for power and lighting wiring should be inspected and qualified.
[PDF]
Keep fiber optic cables safe from being crushed. This helps stop expensive fixes and network problems. Use tough materials like armored cables and conduits. You need strong protection for your cables. Fiber-optic cables are the backbone of modern connectivity—powering 5G networks, global internet backbones, and data center interconnections with near-light-speed data transmission. While these cables are engineered for durability (with some rated to last 25+ years), they are not invulnerable. Even. Fiber optic cables, with their ability to transmit data as light signals through thin glass or plastic fibers, offer unparalleled speeds and reliability. However, the integrity and performance of these cables are highly susceptible to various environmental and physical factors. Yet, outdoors, they face temperature swings, moisture, UV exposure, rodents, and human interference. Protecting them is essential for long-term reliability. Here are detailed strategies for safeguarding these vital communication links: 1. Use of Conduits and Ducts Conduits and ducts provide a physical. Armored fiber optic cables have double jackets and water-blocking layers. These features help protect against rodents and water damage, which is crucial when considering how to protect outdoor fiber cable from rodents & water damage (an armored cable guide). Rodents cause 5–8% of cable failures.
[PDF]
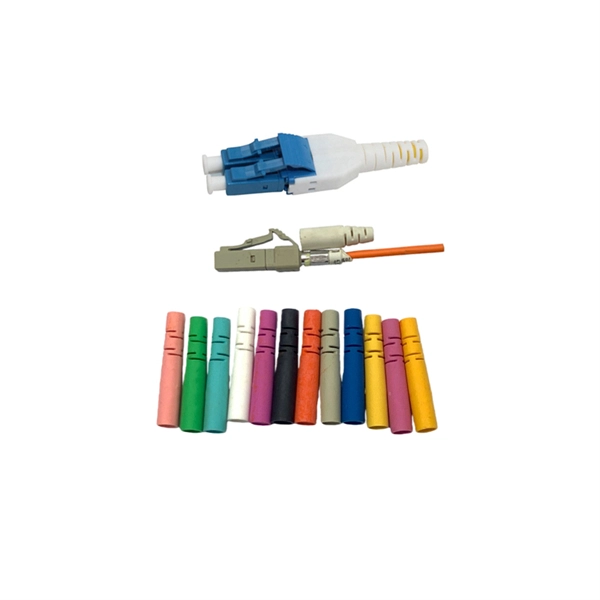
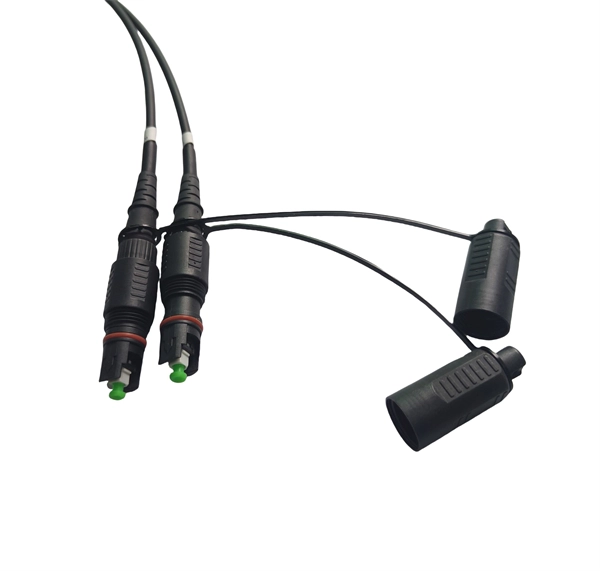
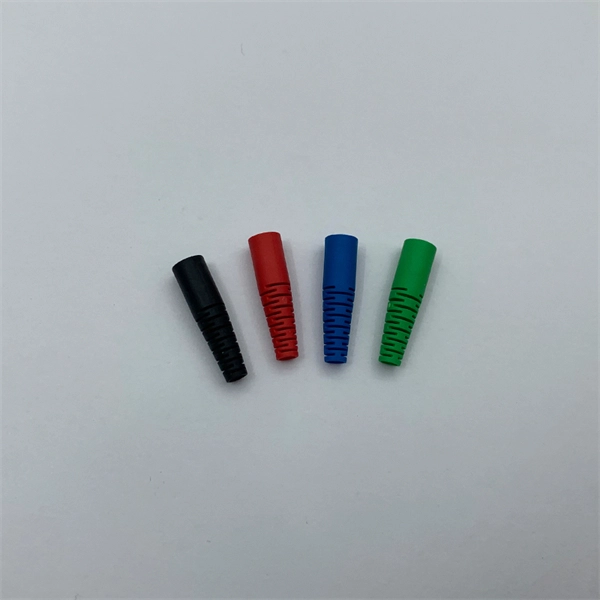
This guide explains the latest EIA/TIA-598-D fiber color-coding standard used to identify fiber types, inner fiber sequences, and connector polish styles. With clear tables and updated details, it serves as a comprehensive reference for technicians handling modern fiber optic. Understanding fiber‑optic color codes is essential for any technician tasked with installing, maintaining, or troubleshooting modern fiber networks. By adopting the TIA/EIA‑598C standard, you gain a universal “language” of colors that speeds identification, reduces miswiring, and enhances safety. Color codes are used in fiber optics to identify fibers, cables and connectors. Each fiber strand is color-coded to help network technicians match, splice, and troubleshoot connections, which is especially important when you're dealing with cables that. Fiber optic color codes provide the essential identification framework that enables fiber technicians and network professionals to manage complex optical network installations efficiently. The Telecommunications Industry Association (TIA) especially launched the TIA-598 standard. This standard addresses the manufacturer's fiber color codes to follow and reference.
[PDF]